Contents
Index
Importing Control Points from Survey
When survey work has been carried out and the surveyor has a list of coordinates for a number of points,
GeoSurvey can be used to import and display these points automatically.
The point data needs to be in either a csv file,a T27 file or an asc file to be able to be imported
into GeoSurvey. If the point data are not in any one of these file formats,
then they need to be converted/saved into one of these file formats so that they can be imported.
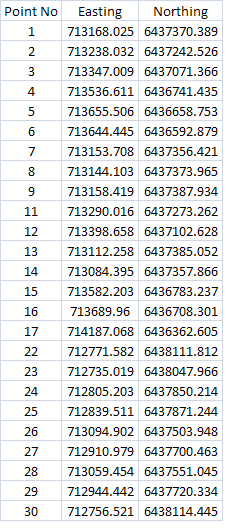
The point data should consist of the Point Number/Name and the Easting and Northing Values.
Importing into GeoSurvey
Once the point data is in the correct file format, it is ready to be imported into GeoSurvey.
Create a new job in GeoSurvey and edit the default 'Job Properties'.
Select "Conversions" - "ASCII File" - "Import ASCII File".
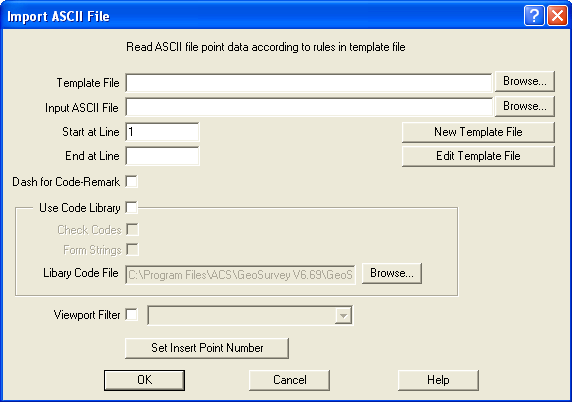
A New Template File must be created if a Template File does not already exist. Select "New Template File".
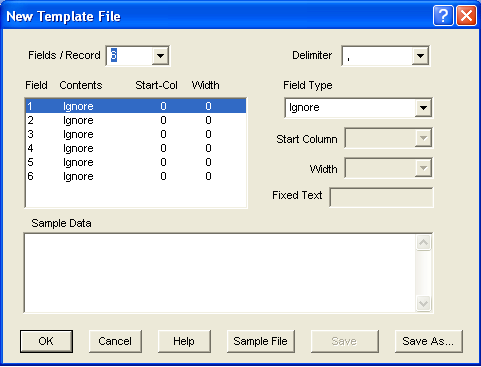
As the csv file we are using for this example has 3 fields, change the Fields/Record drop down box to "3".
Three fields are now displayed, each with the 'Contents' listed as being "Ignore".
With the first field highlighted, select "Name" from the Field Type drop down menu.
Highlight the second field and select "Easting" from the Field Type drop down menu.
Highlight the third field and select "Northing" from the Field Type drop down menu.
Finally, make sure that the Delimiter has the comma (,) selected.
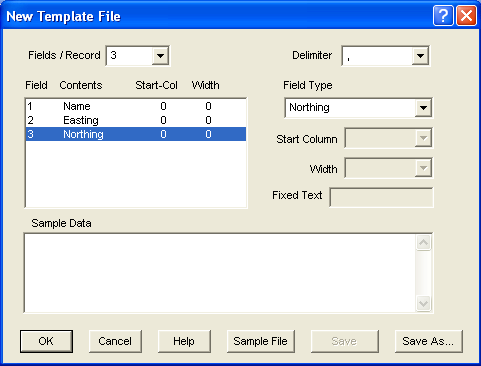
Save this template file (*.tem) with an appropriate name in a location that you can browse to and select "OK".
This template file, including the directory of where it has been saved, will now be shown as the Template File that is to be used in the Import ASCII File dialogue box.
Browse to the location of the Input ASCII File. This is the file which contains the point data.
The data to be imported should only be the point data so if the ASCII File being used has additional header information, then the line to start the import will be the first line which contains the point data, being the Point Name/Number and the Easting and Northing Values. For the csv file being used in this example, the 'Start at Line' needs to be changed to 2.
The 'End at Line' is the last line of the ASCII File which contains the final point data. For the csv file being used in this example, the 'End at Line' needs to be changed to 48.
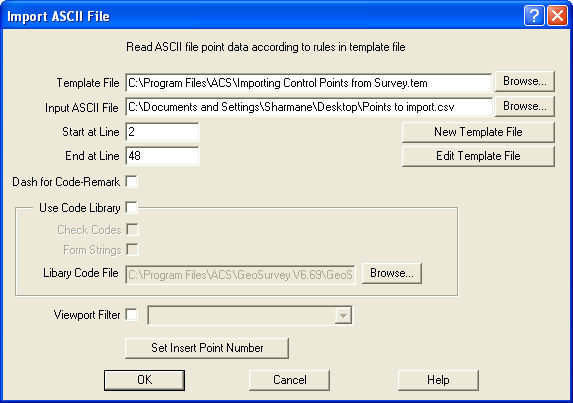
Select "OK". The program will now show a message indicating the total number of points that were read from the selected ASCII File.
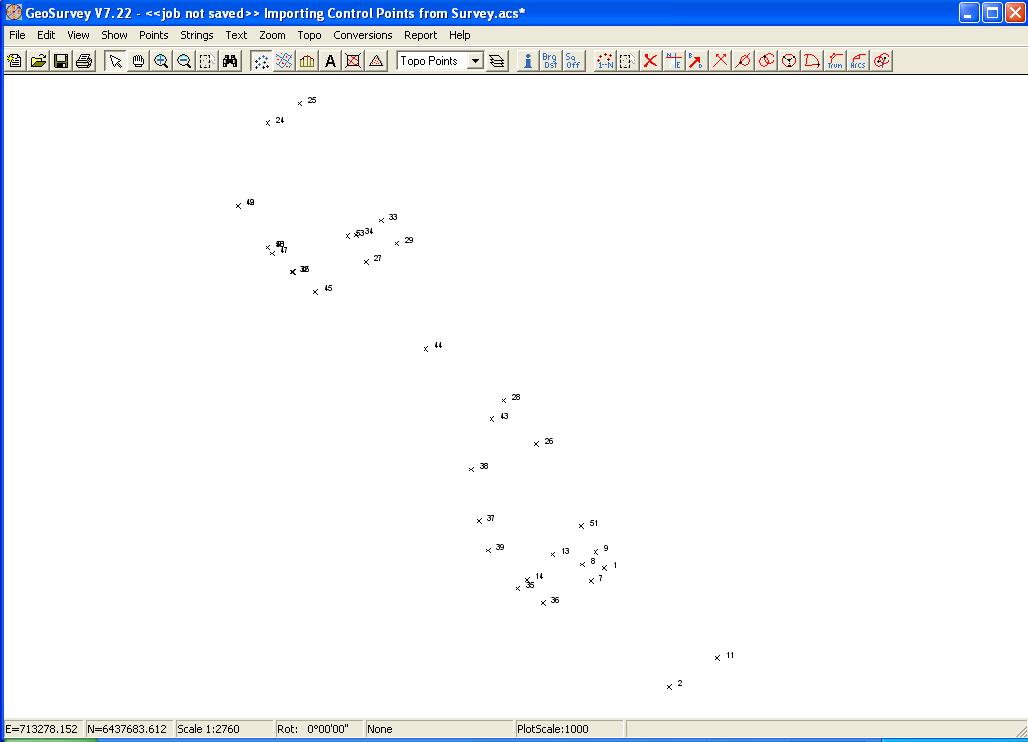
Select "Zoom" - "Zoom All" to view the imported points.
Modifying the Imported Points
Edit the Layer Options so that the imported points are clearly visible.The point symbol, size and colour can all be changed to suit individual requirements.
Make sure that "Show Name" is ticked in the Layer Properties as this will display the Point Name/Number which was imported with each set of coordinates.
Untick "Show Pt No" as this is the program generated point number and can be confused with the imported Point Name/Number.
Each of the imported points is categorised as having a Type being 'Point'.This Type can be changed for individual points or a group of selected points if required.
The categories in which the points can be changed to are:
1. Station
2. Control
3. Interpolated
4. Ref Mark
5. Bench Mark
This can be done by selecting the point/points to be changed and then right-clicking on one of the selected points.
Select 'Properties' from the menu that appears. This will bring up the Point Properties for the various selected points.
Choose the 'Type' required from the drop down menu and 'Save'.
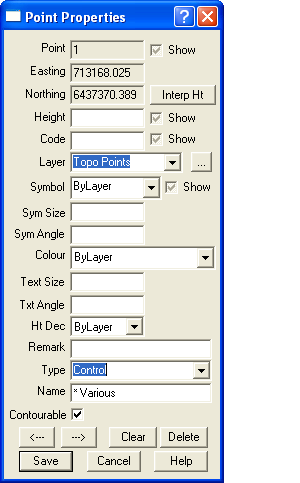
In this example, the Type was changed to 'Control' which means that all the selected points are now Control points.